This post may contain affiliate links that grant me a small commission at no extra cost to you.
Follow along with my first upholstery project - a DIY vanity stool with a ruffle skirt.

I have had my eye on a vanity stool with a ruffle skirt from Ballard Designs for a while now, and when I found the vintage vanity of my dreams, I decided it was time to take action. The problem is, the stool is around $400...a little more than I wanted to spend!
It ended up being a pretty easy fix when I found a stool in need of some easy reupholstery at Savers on 50% off day. Yay!
Today, I'll show you everything you need to upcycle any vanity stool into an upholstered beauty with an easy ruffle skirt!
You really can use any stool for this project. You don't need to worry about the legs or anything, I would just flip the stool over and ensure you will have easy access to remove the current fabric covering the stool. I picked something that would fit with my current vanity height and that I knew I could recover with fabric.
"Yes yes yes!! I love this set works great for crafts and small projects."
I have needed a staple gun for forever and always held off because I figured they were expensive. When I finally looked them up for this project, I was kind of shocked to discover that they are $10! I went for the lightweight stapler (works for crafts, upholstery, etc.) so if you're intending to do some more heavy duty projects, I would spend a little more, but this one worked great for this little upcycling task.
If I were to do it again, I would probably spend $15 more just to get the heavier duty one, but totally up to you!
"I was a little skeptical about using these, but they actually do the job and are easy to use."
The staple gun I bought above came with a staple remover and a few different sized staples. This is something you'll need to remove the existing staples from the previous upholstery job. I used something similar to the ones above and it worked just fine, but again if you're trying to take out some pretty heavy duty staples, you may need something a little stronger.
Seems pretty simple, but most stools will have screws that attach the stool base to the pad. You'll need a screwdriver to remove these and then reattach them.
You can pretty much use any fabric for this project, but I ended up thrifting mine. You'll want enough to cover the stool pad and to create a wraparound skirt for the legs. Each stool will probably require a different amount of fabric, but I would just measure those two locations and pad it a little bit to ensure you have enough.
Another thing to think about is picking a fabric that will be durable. You of course can use whatever you'd like, but I've definitely been reading some books with upholstery tips and they advise to stay away from satin and pure cotton. Linen and polyester tend to hold up better.
I went with something cheap and a pattern I thought was pretty, so we'll see how long it lasts. The nice part about this project is that you can redo it over and over and over.
Upholstery fabric can be a little more expensive, but it's pretty easy to thrift. Some patterns that I think would work great are ticking stripes, toile, gingham, etc. I kind of love when a vanity stool is a little bit of an accent in a room, but totally uo to your personal preference.
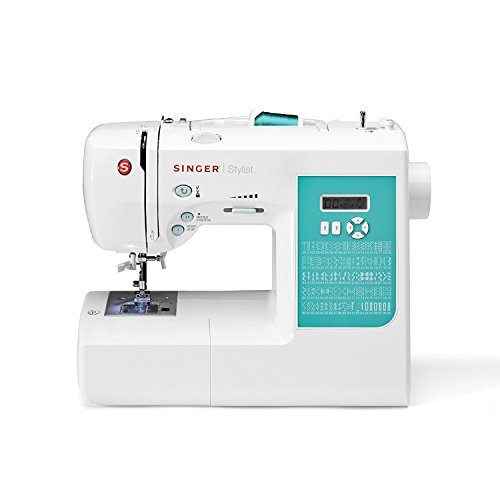
"Great value for money. The machine does everything I want and is so easy to use."
This is the sewing machine I personally have and use. It's a great beginner machine and I still use it to this day!
"Nothing like a new pair of fabric scissors. Works great, great price."
I always recommend fabric scissors because I used to waste so much time trying to cut fabric with regular scissors that I consider them to be a crafting essential!

I didn't take that great of photos for this step but basically flip over your stool and remove the screws that attach the pad to the frame. Remove all the staples with your staple remover. At this point, you should be able to remove the old fabric piece from the foam and wooden circle that holds the foam in place.


Place your fabric piece on top of your foam and cut a wide circle around it. Be sure you account for the fabric wrapping around the sides. If you cut too short of a piece, you'll have places where you can see the base.


Staple the fabric wrapping around the foam and the wooden base by pulling the fabric taut. You want it to be as smooth and flat as possible. This took me a little bit of trial and error.

Cut a piece of fabric that will wrap around the circular wooden base that you just upholstered and that skims the floor. We will hem the skirt so be sure to account for 0.5" of seam allowance on the bottom. Make sure the piece you cut lengthwise fully wraps around the base with some extra overlap to spare just in case. Iron this piece of fabric.


Hem the skirt by rolling the bottom up and folding the raw edge inside. Sew along this line. Make sure you're sewing on the inside of your fabric. Here is a video I watched to help me with the hem:
I know it technically shows you how to hem an actual skirt that you would wear, but it's the same concept!


Now for the fun part! We are going to ruffle the skirt. Basically, you are going to set your sewing machine to the longest stitch length you can. You are going to sew along the top part of the skirt (opposite of the hem side) and while you do that, you are going to keep tension on the thread feeding into your needle. This is the video that taught me how to do this:
I did this once and felt like it wasn't ruffle-y enough for me. So I did another row which I think helped. Looking back, I would maybe even do another row to make it extra ruffle-y but I still like how it turned out!


For this part, I'm sure there is probably a more sophisticated method for attaching the skirt to the base, but I'm lazy! So I just turned my skirt fabric inside out and stapled it to the base from the underside. If I can get up the courage to learn how to make some piping, I'm sure this project would look a lot more professional! But hey, it was my first attempt and I think it turned out pretty good!

For the finishing touch I quickly hemmed the end fabric so it looked clean on the sides. Would be smarter to do that when you hem the bottom, but my fabric was still a bit too long and I had to trim it anyways.
I ended up leaving mine like this although I'm sure you could sew it closed instead. This is why I recommend having a good amount of overlap in the length of your skirt fabric, so you won't see the inside of the skirt.

What do you think of my upholstered vanity stool? Be nice, it was my very first upholstery project ever! I hope I am able to keep improving with it. It ended up costing me about $15 which I think was perfect!